
Our goal in building our campervan was to create a simple, basic traveling tent that would allow us to live and work comfortably on the road. We are teachers and our all three of our children are currently in college. So it goes without saying that we did not have a huge budget to work with. Our van took 10 months and roughly $5000 to build. We did (almost) everything ourselves… after watching a gazillion van build videos on YouTube and debating (and debating and discussing)the fine points of insulation, flooring and design, and a whole bunch of other stuff we had little knowledge of. In this post, I’ll share the details of our simple, budget-friendly build.
Starting Point
Our van, Stevan, is a 2014 Ford Econoline e350 Passenger Van, extra long.
Stevan had 70 some thousand miles on it when we bought it and had been used to transport maple syrup on a local farm.

The van was originally red but was painted black on the outside. You can see that it used to be a red van when you open the doors.. or notice the bad paint job.
There was beige carpet, beige plastic paneling and a bunch of other beige stuff inside.


Undoing
Not as easy as you’d expect to undo all that beige.
We spent a lot of time ripping out the plastic side panels, the seats, the back seatbelts. But there were a few things we could not undo. Chief among these was the rear air conditioning unit which took up prime real estate on the back left side.
We brought it to our mechanic, for the removal of the AC unit, and a few other things that our tools could not unbolt. This was the only part of our build we did not do ourselves.
After removal, the van looked like this:

Floor

We inspected every inch of the metal floor. It looked pretty good! There were a few open bolt holes and (thankfully!) only a little rust.
We sanded down the rusty spots, repainted over them with Rustoleum and then filled the bolt holes with putty to keep out the rain water.
Dan had to lay fiberglass over the spot where the air conditioner had been. A pretty large hole opened to the outside down there.
We added sound deadener in the gaps between the raised floor panels and on the walls and tire wells.
Our insulation choice was ½ inch polyiso. After some miserable failures– err… false starts, we cut it to fit the shape of our floor. (Anybody who says to cut your flooring by tracing the carpet you removed from your van does not have a Ford Econoline Passenger Van, just sayin’.)
The subfloor was a 1/4 inch layer of plywood, treated with anti-mold paint. We sprayed foam insulation into the gaps between the subfloor and the walls.


The hollow spots in the walls were covered over with Reflectix for (rather minimal) insulation.
We chose NOT to insulate them more rigorously as we were worried that wool might attract mice and had the bright idea to avoid extreme temperatures. Not that easy, as it turns out. But we haven’t been that uncomfortable, temperature wise. At least not for very long.

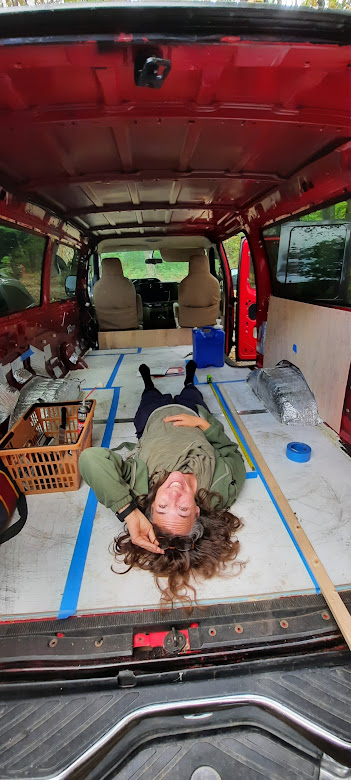
We took some time to see how our design would fit on the actual (sub)floor of the van.
Then we laid vinyl plank flooring, which seemed like it would be an easier job than it was.


Ceiling
For the ceiling we selected stained shiplap boards lined with Reflectix and bolted directly to the crossbeams of the van. There is a 1 inch gap between the van ceiling and the boards to (hopefully) provide some heat barrier.


It took some teamwork to get those boards in place, so we don’t have many pictures of the process


We installed a Maxxair deluxe ceiling fan, which was a bit terrifying. And for good reason: we made a mistake in centering it. (Pro-tip: Never assume the interior of your van is symmetrical without measuring.) No worries, we were able to correct it and finish the job.


Interior
Oh, that design process! It’s both fun and daunting to settle on a design. Knowing what we wanted our van life to be liked really helped us narrow it all down. Although we prioritized outside space, we wanted to have a workspace inside the van (if needed) so our bed converts to a table and bench seats.
Dan added framing to the walls and build the interior to connect to it. The final benches are painted and have airholes to help prevent moisture build up and mold. The bench tops flip open and are in two pieces for easy access.


In addition, we added a swivel to the passenger seat so that we could use more of our interior space.


Benches and Bed
Our bed is queen size, though slightly shorter than a typical mattress. One of the benefits of having an “extra long” van is that we did not have to try to squeeze our bed in sideways. We are not tall people (5’6″ & 5’11”) but we couldn’t quite fit sideways.
We bought the bed foam from an upholsterer and ordered our fabric from Etsy. Dan sewed the bench covers. (He is a man of many talents!) We bought stick-on wallpaper to line the boards behind the back cushions so that when we were in “bed mode” it would not be just bare wood.


We bought a Lagun Table Arm, one of our bigger purchases. This made it so that our table could swing for easier access, and we could free the aisle if needed. Tight spaces require flexible gadgets.

Cupboards
The cupboards were bought from Lowe’s. They had been damaged during shipping and were on clearance. Lowes gave us an awesome deal. We paid $80 for three.

We stained them and Dan cut them to fit our space.
Our brother-in-law was remodeling his kitchen and he gave us another smaller cupboard to use as a kitchen shelf.
We bought wall stickers (again from Etsy), cut them and pasted them behind the sink as a backsplash.


We really wanted a bookshelf but couldn’t figure out a design that would fit with our space and keep the books from falling. We ended up buying a metal and macrame shelf on clearance from HomeGoods. It does hold our books– and every other odd and end we need quick access to.


In 2023, we gave away this storage shelf and built a bookshelf for our books, giving up some window space. But it’s much easier to access our stuff this way.
Kitchen and Plumbing

We tent camped for many years, so we did not feel the need for a complex water system. Two 5 gallon jerry cans suffice. Our “kitchen” includes a faucet with an electric pump. The faucet has a cooking pot catch basin or can swing around to be used from outside the van. We do not have a gray water tank.
We decided to save money and power on our cooking system and keep much of our car-camping set up for the van. And so we use the same propane single burner stove we’ve had since the kids were little. (In 2022 w3e bought a 2 burner propane campstove to replace the single burner model)
In addition, we use our “pocket rocket” backpacking stove for morning coffee.
We prioritized food storage to enhance the variety of meals we could prepare. We have room for spices, sauces, cans and drygoods. And added a wooden “chuckbox” to protect our food from rodents and make storage easier.
There’s a coffee basket on one of the shelves that has everything needed for that first cup of joe.

Our 12v refrigerator sits between the front seats when we are driving and moves to the space behind the driver’s seat when we are parked up.
Storage
Initially, we worried that we would not have enough storage in our van.
A custom built or van-sized roof rack was way out of our price range. So we added ladder racks (bought for $50 at our local junkyard) and a deck so that we could use the roof as a sit-spot as well as easily attach items if needed.

We bought a large rooftop carrier to carry our campy stuff like folding chairs, the screen tent, the laundry bag. But during the shakedown trip, we found that we already had the storage we needed. So the carrier never saw the light of day.
Our van has massive space under the benches and also inside the cupboards. We keep all our kitchen gear and food in the passenger side cupboard. All our books (we have so many!) are on the book shelf along with items we need frequently (tissues, hats, sunscreen, nail clippers, charging cords, etc.)
Our backpacks and hiking gear all fit under the bed. We used to have an ottoman that folds when not in use to conceal our emergency toilet bucket. But it was fragile and purely decorative, so now we just have the bucket…. which is 95% of the time our recycle bin/trash can.
Electric System
We originally planned on building a solar electric system for our van. But the cost and complexity were a concern. Was it worth the price? Would we have to park in the direct sun to use it? Not ideal in a black van with windows… Would we even be able to build such a system on our own?
When my parents generously offered to buy us a Jackery 1500 for my birthday, our decision was made! When we are parked, our Jackery powers our fridge. It also charges our computers and Dan’s CPAP machine. It has been awesome!


In addition to the Jackery, our van has an auxiliary battery under the floor on the passenger side. This “house battery” powers our ceiling fan, the overhead lights, the water pump and a few USB chargers. Dan installed an isolator on the van battery so that our power use won’t drain the engine battery. So far this system meets our electricity needs easily.
2024 Update: We have a lot more solar these days: 400 watt on panels affixed to the to top of the van and 200 more that we can move around outside to follow the sun. The Jackery is great, but it turns out we needed a lot more power to ensure that Dan can work on the road. We run our Starlink system and a computer as well as the fridge and a CPAP these days.
A Budget Build
All in all, we are happy with the simplicity of our design. It is basic and relatively budget friendly, while providing all that we need.
The cost of our van build was less than $5000. Adding the $1000 for the new all-terrain tires, and the $15,000 we paid for the base vehicle, the total cost of our crazy brave adventure van was around $21,000. We are proud of our quirky little home and look back on our van build as a crazy brave adventure in its own right.

Discover more from Following Our Blus
Subscribe to get the latest posts sent to your email.
congratulations on such a well written post
Thank you, Michael.